When the color changes are relatively subtle, I just wind my warp as I normally would. When the skein is one of those really yummy, non-repeating, contrast-y ones, though, you run into the Cat Barf problem, as pointed out by Syne Mitchell in this Weavezine article. The handy-dandy Bonus Content to the article describes a nice way of working with non-symmetrical skeins. I had one of those - Why didn't I think of that?! Doh! - moments when I read the article...
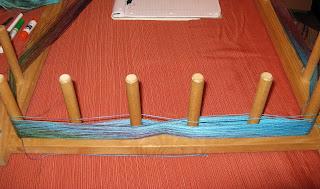
Here's a picture of a painted skein being wound into a warp using Syne's method:

The skein I'm winding here is about 50" around, and I need about 100" for one of my scarves, so that worked out just right. I basically made a big 100" diameter circle with the yarn, making a cross on the left side. Any longer and I would need a lot bigger warping board!

Here's the cross. Looks weird, doesn't it? But since I generally warp front to back anyway, it's really the same thing. I'll just cut it a bit above or below the cross (haven't decided yet) and proceed as I normally do.
One thing I did notice is this:
 The yarn tends to get a bit out of whack as I wind. But that's actually just fine. I wound the skein all onto the pegs and then I just sort of tugged/slid those upper, misaligned yarns back to where I wanted them:
 Easy! They slid very nicely along their path, nothing tangled, and now the colors are placed more or less how I want them (I may have to mess about with a little more, but I like this so far.) (And pardon my messy dining room - it's basically a project room for Bella and me at this point...)
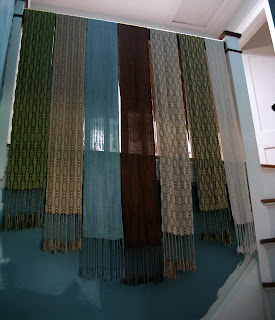
Just one more picture:

A bunch of scarves, hanging on the upstairs railing to finish drying. Right up above them (not in the picture) is bottom of the new sun tunnel that was put in when we got our roof replaced. I love it -the upstairs landing is now the brightest place in our little Cape!
Obviously I'm way behind on photographing/listing things on Etsy and 1000Markets. Ah well, it's summer, it's slow season for me. (And, yes, I do need to finish painting the stairwell... It never ends, lol!) Open Studios this Saturday, though, and I'm trying to weave like mad to have inventory for the Boston Ahts Festival in September as well as the big Lowell Open Studios, etc.


5 comments:
I like your new warp with all the colors. Funny way of doing a warp I must say, have never seen anything like it before.
Beautiful collection of scarves you've got hanging there.
One of my favorite things to make is painted warps. And I like to shift them around to make that sort of flame point effect. I like how you just tugged to bring it into place. Great tip!
I enjoy your blog and seeing the lovely scarves you weave.
I'm curious about something in this post, why do you wrap the yarn around the edge of the warp board, instead of zig-zaging from side to side?
Thanks, Dorothy! Normally, I zig-zag, just as you mentioned. In this case, I was working with an asymmetrically painted skein of yarn and I wanted to preserve the blocks of color. If I warped it normally, the colors would have been all mixed up together (sometimes a nice effect, but I wanted to try something different, here). By warping around the outside, I was basically expanding the skein from a 50" circle to a 100" circle, allowing the blocks of color to stay more or less in place in the warp, and making the warp long enough to work with. Make sense? :)
Thank you! That's something to remember, I haven't worked with handpainted warps - yet.
Post a Comment